Glide Armor Tears of the Kingdom
Clothing and armor aren’t just for show in the latest Zelda outing, and few more so than the awesome glider gear.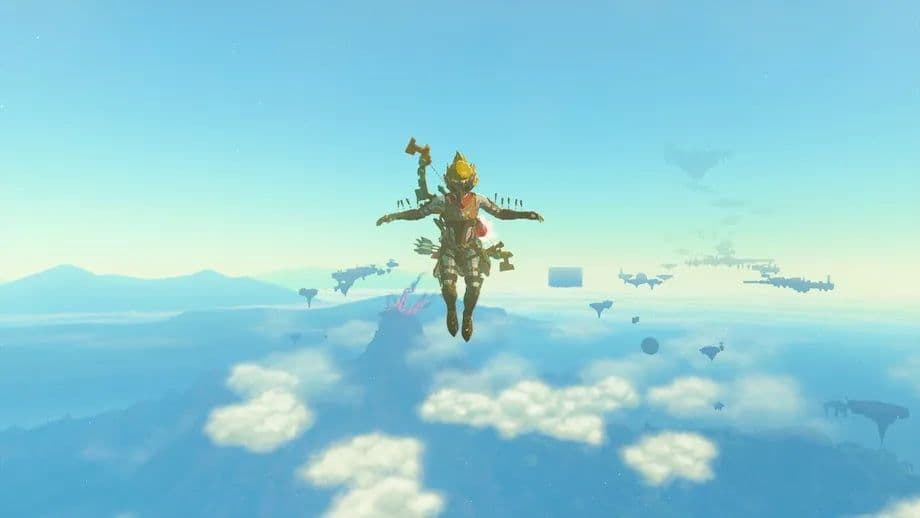
Clothing and armor aren’t just for show in the latest Zelda outing, and few more so than the awesome glider gear. Given how important gliding around is in Tears of the Kingdom, we’d dare say the bird-like Glide Armor is one of the most essential suits to collect in the entire game.
Read on, intrepid adventurer, as we fly you through everything you need to know about this incredible outfit.
What is the Glider set?
It’s a three-piece armor combo in TotK that increases your aerial mobility and, when upgraded by a Great Fairy, completely removes fall damage. Oh yeah, you heard that right.
You only need to play this skydiving paragliding Zelda game for about 5 minutes to recognize how valuable that is! Seriously, trust us, it’s a game-changer!
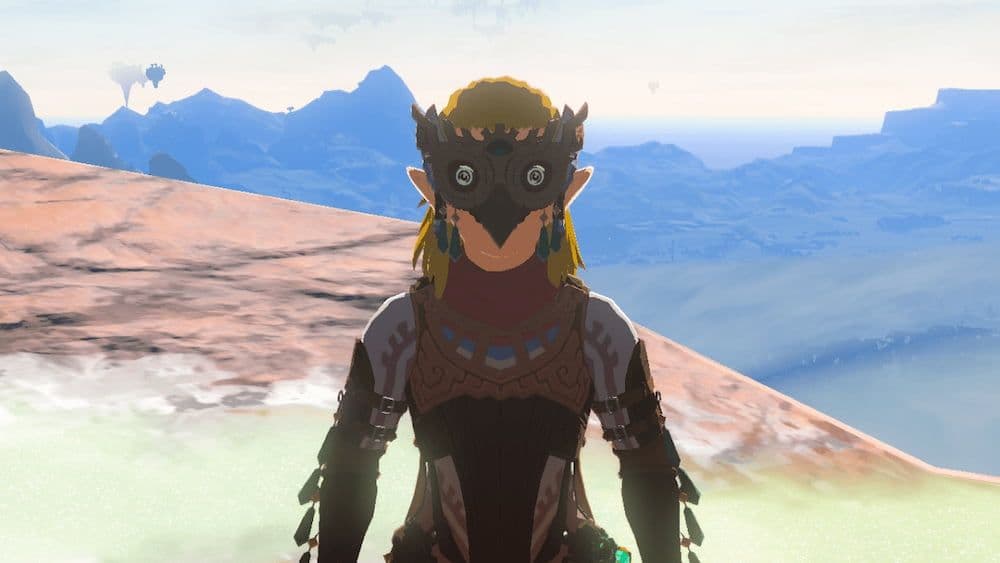
Like other Armor Sets in TotK, the Glide Set comprises a helm, chest armor, and leg armor. For this wingsuit, those items are the Glide Mask, the Glide Shirt, and the Glide Tights.
Each piece of armor has a base Defense stat of 2, and also grants a boost to your Skydive Mobility. So while it’s not the best armor for combat, the glider gear is definitely worth your effort to obtain.
You can’t buy any of this armor set though, you’ll have to earn it…
Where to find the Glide set in TotK
It’s time to stop wondering where the Glide set is. One by one, we’re here to reveal each of the suit locations, and get you that gliding armor before the day is out (the real-world day… not the Zelda day, just to be clear).
Pro tip: stock up on stamina-boosting meals and elixirs before you go, as there’s some fairly long-distance flying ahead of you to get this gear.
How to get the Glide Shirt
Getting the Glide Shirt involves a trip to the Sky Islands, and a Dive Ceremony… which is basically skydiving and gliding through a series of green hoops. It’ll cost you one Zonai Charge to attempt, so make sure you’ve got that first.
The easiest way to get there is to launch into the sky from Lindor’s Brow Skyview Tower (coordinates -1901, 1243, 0297), then drift to the small circular island nearby, Courage Island (coordinates -2226, 0927, 1644).
Pro tip: use the scope from the Skyview Tower to look up and locate Courage Island - it’s that swirly corkscrew-looking chunk of floating rock.
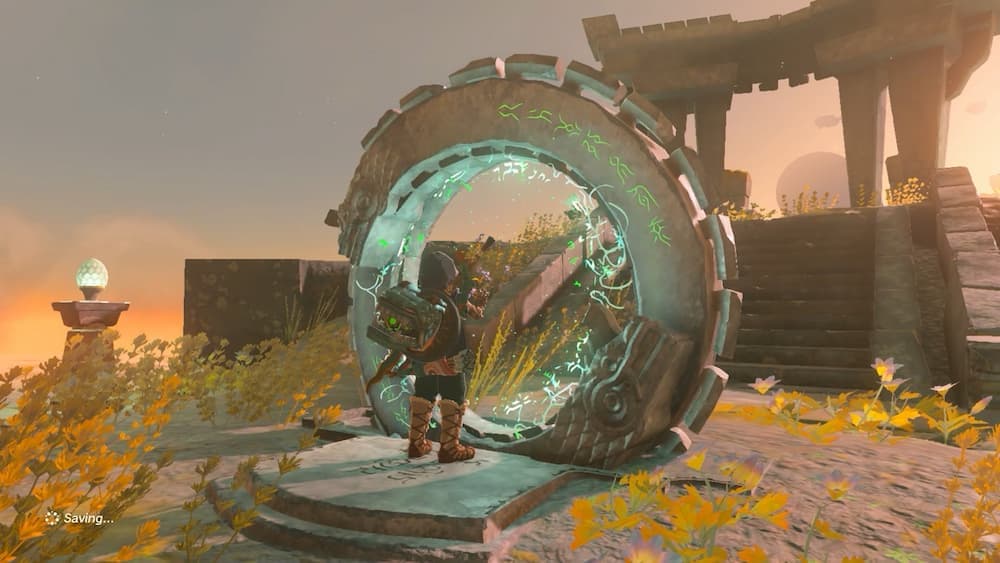
From the top of Courage Island, press A to examine the stone ring – a green ring will appear nearby. Jump off the island, through the ring, and follow the course down to the water at the bottom of the spiral.
Up ahead, you’ll spot a shrine (always worth activating at least as a waypoint). Explore nearby to find a Steward Construct. Chat to the Construct and participate in the Dive Ceremony it mentions.
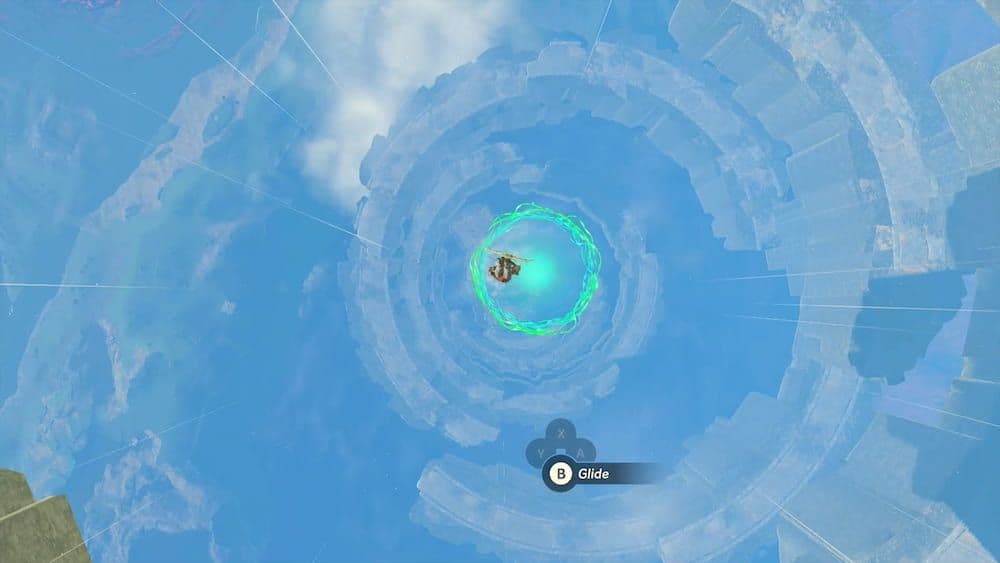
The Ceremony itself is pretty straightforward… in fact, it’s exactly what you just did – skydive through the series of rings in less than 35 seconds. After completing the challenge, the Construct will reward you with the Glide Shirt.
Pro tip: avoid using R to speed up your skydive too much if you’re struggling to complete the challenge (or any of the other three!)
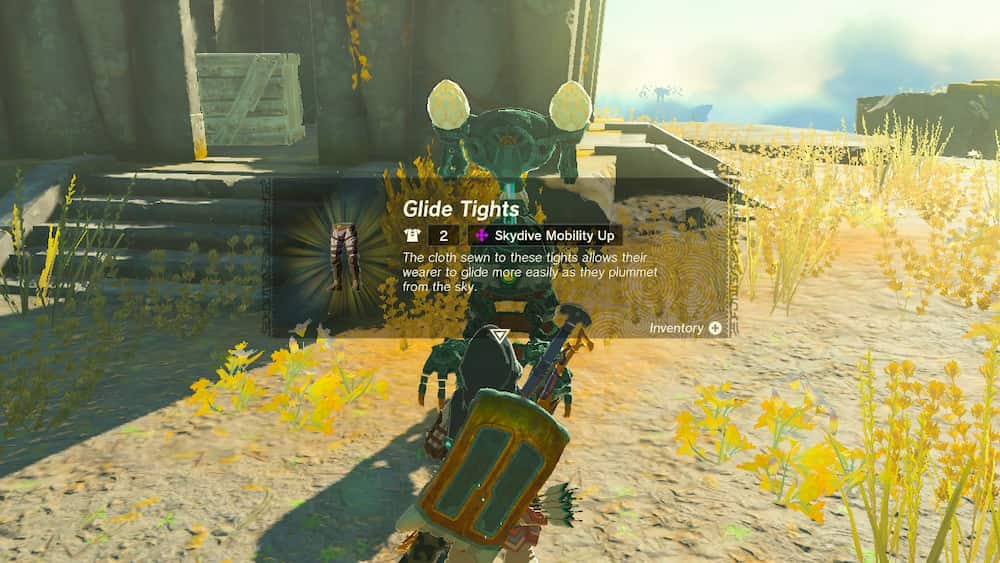
How to get the Glide Tights
Just like when getting the Glide Shirt, we’re taking another trip to the Sky Islands and trading another Zonai Charge for this. You’d do well to wear the Glide Shirt and bring along anything that improves your stamina for this one, since it’s quite a flight!
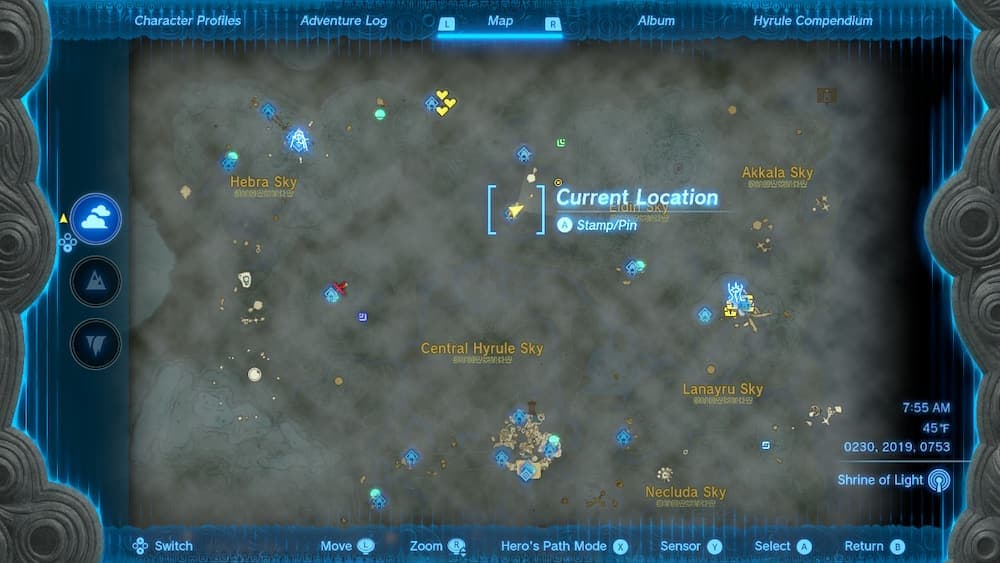
Head to the Thyphlo Ruins Skyview Tower (coordinates 0343, 3133, 0180) in the far north of the map, launch yourself up, and then glide south to Bravery Island (coordinates 0163, 1972, 0759). Once again, you’re aiming for the corkscrew-shaped island.
Pro tip: there’s no shame in stopping off at one of the smaller islands en route to refresh your stamina a bit.
Once you reach Bravery Island, it’s a similar show to getting the Glide Shirt – find the Steward Construct, trade a Zonai Charge to begin the challenge, then dive and glide your way through the rings until the end of the course.
This challenge definitely cranks up the difficulty from the last one though, so don’t attempt it if you’re even slightly hangry. The rings move and clouds block your view – to say it can be frustrating might be an understatement!
Complete the course in under 35 seconds though, then chat to the Construct at the end and you’ll add the Glide Tights to your inventory.
2 down, 1 to go for the full set…
How to get the Glide Mask
Getting the helmet of the Glide Armor set involves… yup, you guessed it – another trip to the Sky Islands and another Zonai Charge challenge fee.
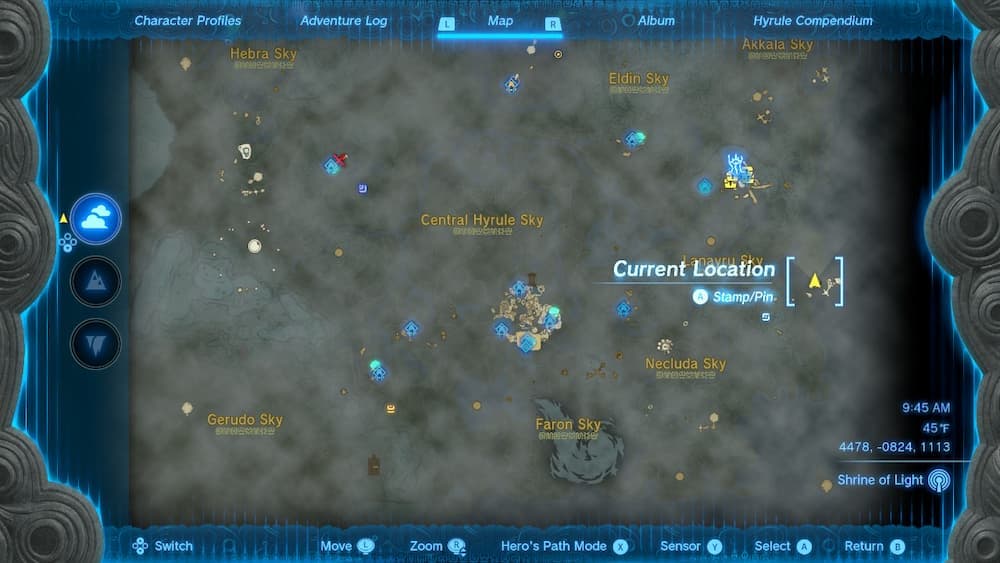
This time, head to the Mount Lanayru tower (coordinates 3846, -1307, 0539), launch into the sky, and glide in a north-easterly direction to Valor Island (coordinates 4544, -0845, 1121). Like getting the Glide Shirt and Tights, you’re aiming for the corkscrew-like island.
Pro tip: take some cold-resistant food with you on this trip, you’ll need it! There are also plenty of islands to stop off at, recover stamina, and grab a flying machine to help you on your way.
Once you arrive, it’s business as usual. Just like the rest of the glider set, chat to the Construct, pay the Zonai Charge fee, and fly through the hoops to the end of the course.
You’ll need your paraglider to complete this one and avoid crashing into the islands in your way.
Finish in under 35 seconds and the Steward Construct at the end will reward you with the third piece of the set – the Glide Mask.
How to upgrade the Glide Armor
The gliding armor is great as is, no doubt. But hey, why settle for great when you can have better? Upgrading all three parts of this gear set twice grants you the Impact Proof bonus, making you invulnerable to fall damage, so when we say it’s worth it… you’d best believe us!
Once you’ve unlocked the Great Fairy Fountains in Hyrule, you can exchange materials and Rupees for armor upgrades.
The following table of materials and upgrades applies to each part of the Glide Armor set:
Just remember though, you’ll only get the invulnerability to fall damage while wearing the full glider set, each piece at level 2 or higher.
For the farmers, fully upgrading the full set of Glide Armor, you’ll need:
- 24 Keese wings
- 42 Aerocuda eyeballs
- 48 Aerocuda wings
- 36 Gleeok wings
- 24 Gibdo wings
- 2,280 Rupees
What is the fastest way to get the Glide armor?
There is no single fastest way to get the Glide Armor Set in The Legend of Zelda: Tears of the Kingdom. However, players can finish the process more quickly by following the steps in the right order. The set unlocks after completing the Dive Ceremonies on Courage Island, Bravery Island, and Valor Island.
To save time, visit each island one after another and talk to the Steward Construct at each location. You must complete the timed diving challenges in under 35 seconds. Using Skyview Towers and nearby launch points helps you travel between islands faster.
Every detail about the locations, challenges, and upgrade tips is explained in this article, so players can follow it step by step to earn the Glide Armor efficiently.