How to craft rails in Minecraft: Regular, Powered, Detector, Activator
Rails are one of the easiest ways to build a transport route in Minecraft. To craft rails in Minecraft, you need 6 iron ingots and 1 stick. One craft gives you 16 rails, which makes them a good option once you start mining iron in larger amounts. They also connect with redstone systems, so players can use them for simple travel routes or more advanced item and mob transport setups. In this piece, we show you how to craft different types of rails: regular, powered, detector, and activator!
What are rails in Minecraft?
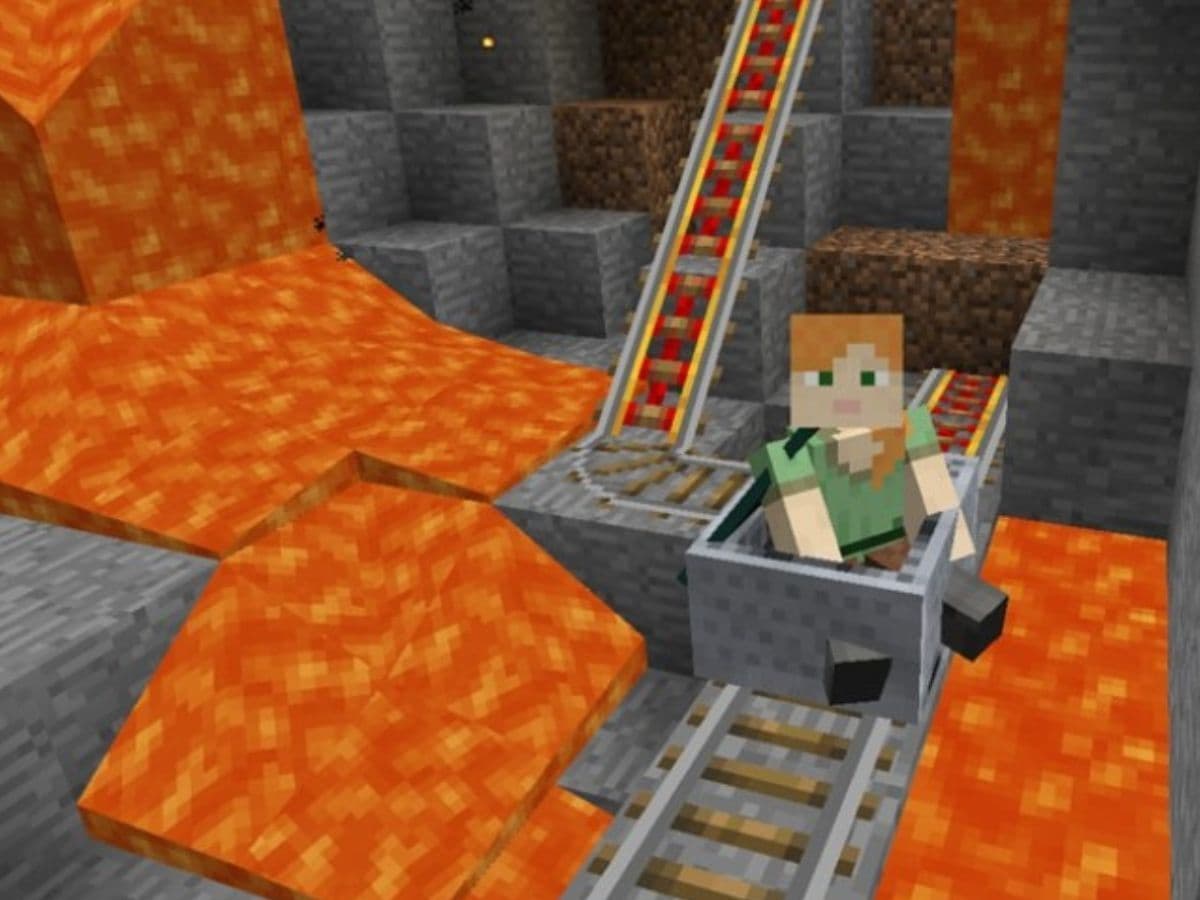
Rails are track blocks that guide minecarts. Players place them on solid blocks to create a route. Once a minecart sits on the track, it follows the rail path across flat ground, curves, and slopes.
A basic rail line uses regular rails, but Minecraft also has powered rails, detector rails, and activator rails. Each type does a different job. Regular rails create the track, powered rails control speed, detector rails send redstone signals, and activator rails trigger special minecart actions.
Rails can also appear naturally in mineshafts and woodland mansions.
How to craft rails in Minecraft
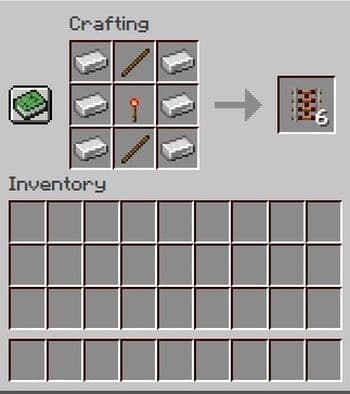
The standard Minecraft rails recipe uses three simple ingredients in a crafting table:
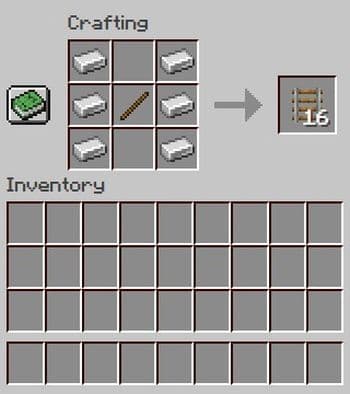
- 6 iron ingots
- 1 stick
- Result: 16 rails
Place the iron ingots in the left and right columns of the crafting grid. Then place the stick in the center slot. This recipe gives you regular rails, which form the main part of most minecart tracks.
What are rails used for?
A rail route can connect a mine to a storage room, move villagers to a safe area, carry items from a farm, or create a ride across a large build. Rails save time when the same route gets used often.
Regular rails do not push a minecart by themselves. A cart can move from player input, gravity, or powered rails. For long routes, you should use regular rails for most of the track and add powered rails where the cart needs speed.
All rail types in Minecraft
Minecraft has four main rail types. Each one works best in a different situation, so a good track often uses more than one type. Here is a look at all and their recipes:
Regular rails
Regular rails make up the main track. They connect to nearby rails and can form straight paths, corners, and slopes. Use these for most of your route because they cost iron and sticks, not gold or redstone.
Powered rails
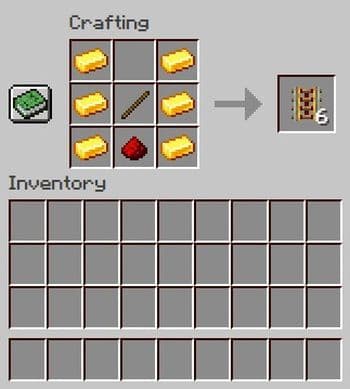
Powered rails use 6 gold ingots, 1 stick, and 1 redstone dust. They create 6 powered rails. A powered rail boosts a minecart when it receives redstone power. If it has no power, it can slow or stop the cart.
Use powered rails at the start of a route, on uphill sections, and across long flat tracks. A redstone torch, lever, redstone block, or powered redstone dust can power them.
Detector rails
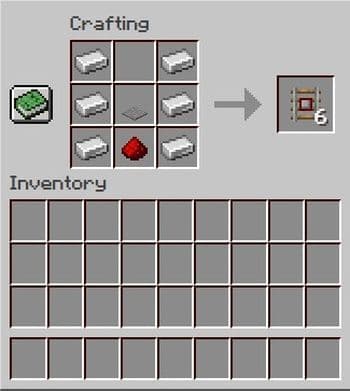
Detector rails use 6 iron ingots, 1 stone pressure plate, and 1 redstone dust. They create 6 detector rails. A detector rail sends a redstone signal when a minecart passes over it.
Use detector rails for doors, lamps, station controls, and item systems that need to react to a cart.
Activator rails
Activator rails use 6 iron ingots, 2 sticks, and 1 redstone torch. They create 6 activator rails. These rails work with special minecart behavior. They can eject riders, affect hopper minecarts, and trigger TNT minecarts.
Most players do not need activator rails for a basic track, but they matter in advanced redstone builds.
How to place rails correctly
Rails need a block under them. Place a rail on top of a valid block, then add more rails next to it to extend the track. Minecraft connects nearby rails automatically.
Rails can turn when you place them at angles. They can also climb slopes when the next rail sits one block higher. This makes them useful in mines because you can build a route from deep underground back to your base.
Best way to use rails in survival
The best survival rail setup uses regular rails as the base and powered rails only where the cart loses speed. This saves gold and redstone while still giving the route enough momentum.
Start with a short track between your mine and storage area. Once you have more iron, extend the route to farms, villages, or other bases. Rails become more useful as your world grows, especially when you repeat the same trip many times.
Check out more Minecraft guides:
- How to change skin in Minecraft (Java, Bedrock, PC, and Console)
- How to TP in Minecraft: Teleportation explained (Coordinates, Villages, Death Location)
- How to tame Parrots in Minecraft: Seeds, advantages, and more
- Smelting in Minecraft: A complete guide to furnaces, fuels, and efficiency tips for 2025
- Minecraft enchanting table recipe, setup, language & everything you need to know
Featured Image Credit: Mojang
All Related Guides
 Minecraft Splash Potion of Weakness recipe: Complete brewing guideMinecraft Splash Potion of Weakness recipe guide: ingredients, brewing steps, villager curing, and common mist...
 How to craft a bookshelf in MinecraftLearn how to craft a bookshelf in Minecraft, place it around an enchanting table, and reach stronger enchants ...
 Smelting in Minecraft: A complete guide to furnaces, fuels, and efficiency tips for 2025Master Minecraft smelting in 2025: best furnaces, fuels, and pro tips to boost speed, save resources, and auto...
 Minecraft enchanting table recipe, setup, language and moreMaster Minecraft enchanting! Learn the Minecraft enchanting table recipe, setup for max levels, the secret lan...
 Minecraft blast furnace recipe: How to make a blast furnace in MinecraftWant to smelt ores faster? Here's the blast furnace Minecraft recipe and a step-by-step guide on how to craft ...
 Minecraft beacon guide: How to make a beacon in MinecraftBeacon Minecraft guide: Learn how to craft, activate & optimize a beacon for max power, buffs & effects in Min...
 Minecraft piston recipe & sticky piston guideLearn how to craft and use pistons in Minecraft! Master sticky pistons & get secret doors, traps, flying machi...
 Minecraft lead recipe explainedLearn how to craft a lead in Minecraft! Easily transport, secure, and manage mobs with this Minecraft lead rec...
- 1
- 2
- 3
- 4
- 5